dinner at eight :: breakfast for dinner

{Dinner at Eight is a special project I am doing with my friend Andi this year - planning date nights at home for our husbands every other week, putting the kids to bed early and being intentional about our marriages! Read more dinner at eight posts HERE!}
 It has been another sick week for me so when I started thinking about planning our little date night I felt the perfect solution to go with our theme of breakfast for dinner was to serve it up in bed! This was my favorite theme so far for sure. I didn't have to do much but light a ton of candles and string some twinkle lights. I made our absolute favorite homemade cinnabon cinnamon rolls (top secret recipe). I usually only make these once or twice a year so it felt very special. Simple eggs, potatoes and bacon to round out the menu and some serving trays all set up for a relaxing night together!
 It was fun but by the time we crawled in bed to eat and enjoy both Chris and I were totally pooped. I had rented Breakfast at Tiffany's to watch together but we ended up skipping it. It turns out eating in bed makes you want to pass out - and maybe heavy antibiotics and steroids mix with our favorite creamsicle cocktails - ha!  (don't worry I only drank about two sips, I am not totally crazy)
And just in case you guys were tempted to think that while I was preparing for our romantic little date my children were quietly reading in the other room I thought I would share a few out takes:
Bath time, laundry, crazy wild kids and all. After we put the kids to bed last night we could hear the boys talking in their room.

"your ruining our date night Levi"

"no I am NOT"

"come here we are reading"

This morning Simon came in and immediately went under the bed and plugged in the twinkle lights and announced that we were having another date in bed for breakfast. I had to indulge him. He also told me all about his date with Levi. It was a reading date in bed with books and yummy food. So cute It's fun to see how our intentional dates at home effect the kids!
I pray that when they are older they might see the importance of dating their spouses and I want to be a good example of a wife to my man so that they will be able to spot a good spouse for themselves one day!

It was a another sweet date night at home the sickies and all!! xo


check out how Andi spent her breakfast for dinner date night with her man it will be up later today!

*ruffle duvet urban outfitters*
::::::::::::::::::::::::::::::::::::::::::::::::::::::::::::::::::::::::::::::::::::::::::::::::::::::::::::::::::::::::::::::::::::::::::::::::::::::::::::::::::::::::::::::::::::::

PS. You guys my Mexican fiesta dinner at eight party bunting from a few weeks ago was chosen as a finalist in the great party DIY challenge with Bliss and Urban Scarlet!! Check it out HERE and consider leaving a comment in support - wink*!!! I hope you all have a fabulous weekend I am excited about next week I have a lot of fun stuff planned around here!!

guest post :: Fancy Felt May Baskets

Fancy Felt May Baskets by Jessica Kesterson {Living the Swell Life

I grew up in a small Midwestern town where May Day was a huge deal!  Every year on the first day in May we would celebrate springtime by filling up baskets of candy, flowers, etc., then ran through the neighborhood, delivering them to our friends.  The only catch was that the recipient shouldn't see who delivered it--so we would set these baskets on doorknobs and doorsteps, ring the bell, and RUN!  It was the sweetest tradition, a day full of thoughtfulness and surprises.  Here's my no-sew DIY on making an adorable May basket, perfect for resurrecting this fine holiday in a neighborhood near you.  This tutorial uses felt, but this project could easily be adapted to paper, fabric, etc.  Enjoy!!


1 | Gather supplies:
felt, cut into one 7x11" piece and 1x11" strip
fabric scissors
hot glue gun
handful of your favorite buttons & trims
needle + thread (if desired, to sew on buttons)


2 | Cut slits:
Fold the 7x11" piece of felt in half, shorter sides together.  Approximately 1/2" above fold, make a 1" snip through both layers.  Repeat on opposite side.  When you unfold the piece, these will become the *tabs* to secure the sides of the basket.

3 | Add trim:
Glue your favorite trim along both ends of the felt (on the same side).  Here is your chance to get creative! Use whatever ribbons, lace, or rick-rack you have on hand!

4 |  Fold & glue:
Turn the project over so that your trim faces down. Begin by folding one tab toward center.  Glue back of right side to the front of the tab.  Next run glue along left side, then overlap and press it into the edge of the right side.  Your basket is half done! Repeat steps on the opposite, except begin by gluing left side to tab, then overlapping with right.  (That way both of your "raw" edges will face the backside of the basket.)


5 | Add the handle:
Glue long strip to the inside edges of bag.  Adjust length to your liking.

6 | Polish it off:
Now go to town, decorating the front with buttons, fabric flowers, and other fun notions as you wish!  To replicate the white flower on the gray basket, you can check out this tutorial!


Make many more, fill them up with sweet treats, and deliver them to your friends + family on May Day!
::::::::::::::::::::::::::::::::::::::::::::::::::::::::::::::::::::::::::::::::::::::::::::::::::::::::::::::::::::::::::::::::::::::::::::::::::::::::::::::::::::::::::::::::::::::::::::::::::::::::::::::::::::::::::

Aren't these the cutest things ever!!! A special thanks to Jessica for sharing such a perfect little project here today just in time for May Day on Sunday!

Breaking News

Just a little FYI that tonight is .31cent scoop night at good old B&R's! I felt it was my civic duty to inform you - now that I have I can go back to resting easy..could be the perfect excuse for a family date night!

So what's your favorite flavor? Mine is rum raisin or jamoca almond fudge or maybe bubble gum...yum!!

when I was a girl

I thought I would do a little re-posting today since I am still sick - I'll post a few goodies from my old blog, Orangepoppy over the next few days. This one originally from May 7, 2009..

when I was a girl

I hated my hair and would pray each night that God would make my curls straight

was terribly skinny

could wrap both legs behind my neck at the same time

use to fake coughing fits when my Mom would make eggplant and convinced her that I was allergic 

would let my sister lip sync in the mirror while I sang from the closet

loved to sing..sing sing sing..

would record songs I'd written and hide the tapes under my bed

would call a boy I liked and hang up after he answered (we dated senior year)

begged my Mom for one of those Popples until she gave in

won a bunny from our school librarian, it was a little black runt that I named Rudy after the youngest girl on the Cosby Show

wore out two of the same Amy Grant tape

loved Debbie Gibson and HAD to have a black hat like she use to wear

burned off my cousin's bangs with a curling iron

was ring bearer in both my parents second wedding, my sister got to be the flower girl {not that I'm still jealous or anything :)}

would decorate the tent when we went camping

loved it when my Mom let us stay home for an R&R day

wanted to be a Mom someday when I was old which I thought was 25..ha ha, I did become a Mom at 26!

Mr. Gough's favorite picture of me as a girl he says I've 'still got em' about my legs :)

 So what about you, what were you like as a kid? Maybe consider doing a similar post on your own blog today and link up in the comment section I would love to see! I might have to do another installment myself! xo

pretty please with sugar on top

make something monday :: pajama day

Happy Monday my sweet Friends. Did you all have a wonderful Easter weekend? We most certainly did. Saturday was a gloriously gorgeous day here in Seattle with sunshine and blue skies and an Easter egg hunt with family and friends! We look forward to my families annual Easter egg hunt all year and this one did not disappoint. It is always so fun to see the parents getting into the action. My Dad and Step-Mom literally hide about 500 eggs and when they give the green light to start searching it's hard to not instantly turn into a kid and get the fever as my Dad puts it. Grabbing armloads of eggs with the little ones. There were smiles all around - and lots of candy and prizes too!
Sunday we were at our Church bright and early just before 7am to celebrate with our Church family - it was a blessed morning. I had my *team* helping me with my three little ones. Grandma and Grandpa with the boys and Auntie Claire with Josie. I could not have made it through three services without them but am always thankful for the opportunity to serve on Easter at Church.  We finally left Church after 1pm and finished out the weekend with a big family dinner yesterday afternoon and then the kids came home to a special package from the Easter bunny (thanks Mom) that they enjoyed tearing into before bed. It was wonderful!

But this morning our family is all still sick. We have been fighting sinusitis all around for the past few weeks, lot of antibiotics and Kleenex and some rough nights. So today I told the boys it was pajama day. We've pulled our blankets and pillows and favorite books and movies into the play room. I manage to make our favorite scones and some eggs for a late breakfast and we are curled up together hunkered down listening to the return of the rain and trying to feel better. No real crafting happening around our home for today but these scones - they are SO GOOD!
Recipe is courtesy of Prudent Baby. I have made them many times most recently with white whole wheat flour and milk instead of the cream. Easy and tasty on a pajama day at home. Recipe can be found HERE!
I hope you are all able to rest and recoup from all the fun you had over the weekend. I will be back soon hopefully feeling better but if someone could let baby Josie know that sleep actually helps you fight the flu that would be great. Sleeping is not her fav I am convinced she just doesn't want to miss anything. OK back to vegging out with my babies today hope you have a good one!
xo

diy :: easter bangle


I have a super easy bracelet project for you on this Good Friday. I wanted to coordinate with my little easter bunny over the weekend so I put this together and thought I would share it with you before I sign off for the holiday!

{go ahead and click on the photos for a bigger view}

for the bracelet all you need is a bangle form. I picked this one up at JoAnnes for only a few dollars in the jewelry aisle
you need strips of fabric in coordinating colors
fabric glue
rhinestones or other embellishments
clothes pin

1. start out by dabbing a big glob of glue onto the bangle form and then grab a strip of fabric and basically just start wrapping it evenly around adding a bit more glue as you go. No real secrets here just wrap the whole bracelet glue the end and hold it all together with a clothes pin while it is drying.

2. I made two silk rosettes with coordinating strips of silk fabric. There are ALL KINDS of tutorials on how to make these around the web and although I prefer to hand sew my rosettes for this easy project I chose to glue. Make a knot in the end of a strip of silk or coordinating fabric and add a dab of glue. The knot is going to be the center of the rosette. Just start twisting the fabric around on top of itself and add glue as you go. When you get to the end of the strip add a big dab of glue to the back to secure the end and let the whole thing dry.

3. Now that the rosettes and the bangle are pretty dry simply glue your rosettes and any other embellishments onto the bangle - I am using a matching rhinestone button and velvet leaf so that I can match Josie and her Easter headband.

Obviously the skies the limit here guys.

I hope you all have a truly wonderful blessed Easter weekend. We will be spending much of the holiday with family and be at our Church home for the three chapel services (8:30, 10:15 & 12:00) helping with music if you want to come by and worship with us we would love to see you there!

Happy Easter Friends - Jesus is risen He is risen INDEED!
xo Rebekah

I am guest posting today!

Head on over to Living the Swell Life today for the full instructions on how to make this over the top Easter Bunny Headband I put together for Josie - just in time for the weekend!! But make sure you come back tomorrow because I am going to show you how to make a matching bracelet so you and your little bunny can coordinate! Full tutorial HERE!

xo,
Rebekah

caught

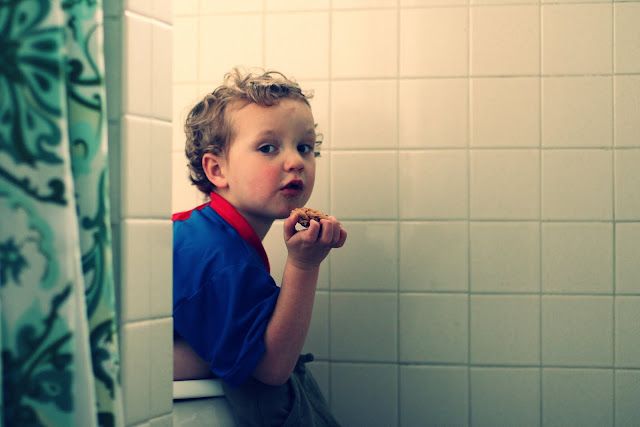
 Today I walked by the bathroom and found my three year old eating a chocolate chip cookie while doing his biz. Imagine his surprise when I started laughing and then got the camera out. I couldn't help myself.
Got nothing but mad love for you Levi - you live your life boldly and in the words of your uncle Kyle your motto has always been: "let's make some history here!"

ps. what do you guys think of my little blog makeover? Courtesy of the talented team at Life Made Lovely Design. Molly did a great job I think it looks quite sunshiny!! 

make something monday :: cactus garden

 Terrariums have definitely been popular for the past few years, I have seen so many amazing ones around the blogesphere especially as of late. But it wasn't until I popped into our local Anthropologie and spotted some sweet + simple ones recently that I thought I needed to make a few for our home.

Anthro is selling simple succulents in a glass jar with some dirt and rocks for FORTY big ones. They were truly adorable but for that price just something to admire in the store. After I left Anthropologie I walked over to Ravenna Gardens just a few stores down here in Seattle's University Village and found these tiny little cactus for $2-$4 bucks each. Perfect solution, I spent all of $15 and today my boys and I made a little cactus garden together.


The rocks and dirt were something I had on hand here at home and the candy jars on our piano were needing a little something. The sweet woman and Ravenna Gardens told me to plant these tiny succulents in a well drained pot with a hole in the bottom and water them about once a week tops. She said if I was to put them in  a jar because of condensation not to water them at all. We did give them a good spritz with a water bottle and left them in the sun after we planted them today but I will most likely take her advice and not really water them any more than that.

We had fun this afternoon enjoying the beautiful sun that finally decided to make an appearance here in Seattle. The one thing about us Seattlites - when the sun peaks out we really take advantage. It was a beautiful day and way to spend time with my little ones!

Happy Monday Everyone!

dinner at eight :: mexican fiesta

{Dinner at Eight is a special project I am doing with my friend Andi this year - planning date nights at home for our husbands every other week, putting the kids to bed early and being intentional about our marriages! Read more dinner at eight posts HERE!}
This past Monday Chris and I celebrated our eighth anniversary!  Such perfect timing with the dinner at eight date night I had planned. Andi and I thought Mexican food sounded fun so I decided to make our date a little Anniversary Fiesta!!!
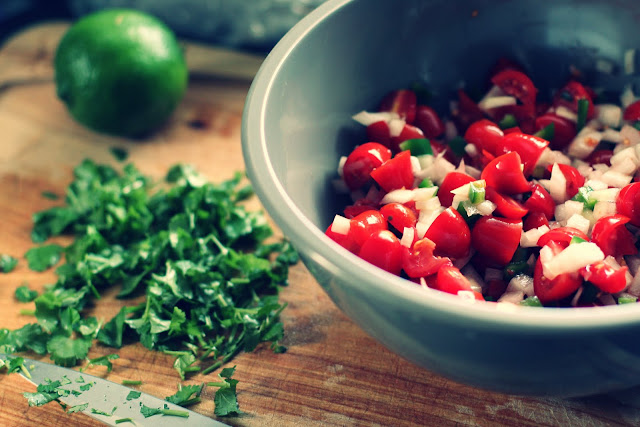
And who doesn't love Mexican food? Mr. Gough adores pico de gallo and chips so I whipped up a big bowl of the Pioneer Woman's version and reserved a little bit for some fresh guacamole too as an appetizer! My easy chicken enchiladas and beans for the main course with lots of cilantro and sour cream - yum!!
My very favorite part about these date nights at home is styling a sweet table with things that I already have on hand. This time I used a favorite anthropologie table cloth, vintage lotus bowls, jars filled with tea lights, a handmade paper bunting and a vintage pyrex filled with some tiny cactus and rocks for the centerpiece. The whole thing came together so fast and made our fiesta quite special and festive!
I can hardly believe it has already been eight amazing years! Over dinner we reminisced about our top eight most memorable moments from our marriage. Things like - our honeymoon, our first fixer upper, the day my water broke five weeks early with our first born (Chris seriously thought it was pee, long story), his band playing at the Showbox, our trip to NYC for my jewelry show - our children of course being the biggest highlight! It was a treat to spend time reflecting on all of our many blessings. Believe me I am so blessed by my husband!
And after dinner I made Mexican hot chocolate and we watched the Three Amigos - ha! We also enjoyed the pretty sunset off of our back deck and some more heart bokeh photography (I am obsessed).
On our actual anniversary this past week our baby girl was in a pretty traumatic accident here at home falling down our stairs in her high chair. It was a total freak thing and when it happened I came pretty unglued. Chris was a rock - calm and cool as a cucumber. Josie IS TOTALLY FINE but had to have a ct scan done and has a small skull fracture. Honestly I don't know what I would do without such an incredible husband. It was one of those experiences where you walk away thanking and praising God for protecting our sweet baby and for blessing me with a partner who meets me where my weaknesses are and picks up the slack.We definitely had time to reflect on that experience over dinner too and marveled at how close God is to us in all of our experience - showing us His love and grace!
It was a really special date night in with my love - Happy Anniversary Babe your a gift to my heart! xo

You can check out Andi's Mexican fiesta HERE! (heard from Andi her post will be up later this evening will update when it's ready!) it's up!

make something monday :: bokeh filter

For months I have been trying to figure out the secret to the heart shaped bokeh that artist like Irene Suchocki are so famous for. I love the look of it and figured it was some fancy photoshop trick or something hard. And then one evening recently I happened upon this little bokeh filter kit and was shocked and thrilled to learn that it is actually a filter you can put onto the front of your lens to create the beautiful, buttery heart shapes. I wasn't sure I wanted to purchase the full kit though and of course was left wondering if I could make one myself out of black card stock. The answer is YES! I whipped this one up this morning and was literally giddy with excitement that it actually works!!! Do you want to make one too? So easy this is what I did:
Basically all you need is black card stock, tape and some scissors. I have a few large circle punches and a heart shaped punch that I thought would make it easier. You really just need to trace your lens cap onto the black paper to get the right size for your camera and then right in the center of the black circle cut out your shape. In this case a heart but you could totally put a bird on it too :).

Then you're going to want to cut a long strip of black paper about 3/4" wide and long enough to go around the circumference of your lens. Mine was about 8" long.
I wrapped the long strip around my lens and secured it with scotch tape. I then layered my flat black circle with more tape and secured that to the ring.
I got it all good and tight..when I make another one I think I will try to scrounge up some black electrical tape from Mr. Goughs supplies but the scotch tape worked fine!

Now set your camera on a low aperture in manual focus and go outside in search of some lens flare. Play around with it - seriously I am so addicted. We went on a walk to test it out and these are a few shots I got!


So be honest did you guys already know this was how heart bokeh was made? Maybe I am the slow kid but if not are you as giddy as me? Send me photos if you get anything good I would love to see!!!

HERE is a more professional tutorial on making your own bokeh filter that I found if you need more help!!! Can't wait to use mine at night!
Related Posts Plugin for WordPress, Blogger...