now without further ado, take it away girls:
:::::::::::::::::::::::::::::::::::::::::::::::::::::::::::::::::::::::::::::::::::::::::::::::::::::::::::::::::::::::::::::::::::::::::::::::::::::::::::::::::::::::::::::::::::::::::::::::::::::::::::::::::::::::::::::::::::::::::::::::::::::
First of all, we are honored to be a part of the Make Something Monday series. We're always scheming up little weekend projects, and some of those shared here have definitely been a source of inspiration for us. A HUGE thank you goes out to Rebekah for inviting us to this wonderful space.
We started making these vintage frame jewelry hangers awhile back after some thrifting binges. You so often find beautiful frames with gorgeous detail work, but often the glass is missing or broken. This is a great project for those finds! Also, I find it frustrating to store jewelry in a box because I always end up with tangled balls (like Christmas lights!). Its nice to be able to turn your jewelry into a piece of art by framing them on the wall.
The first step is to make sure your frame is solid. Wood frames work best since you will be stapling into the backside later. Sometimes if the corners are loose it takes some hammering back in place and/or some wood glue to get things back to square.
Once you are satisfied with the state of your frame, pick your favorite paint color and go to town. Depending on the finish of the frame, a first coat of primer can go a lot way. We used Ace brand enamel spray paint on this frame, but you can use just about any type of paint: acrylic craft paint, latex paint, etc. This is a great way to use up those paint samples that you bought as testers for your decorating! In this case, the paint had a gloss finish, but if you are using acrylic or latex its a good idea to do a finish coat of spray-on polyurethane, just to prevent nicks and scratches.
The next step is to attach your hanging screen. When we first started making these, we were using metal screen because we thought it looked nicest. However, its a real pain to work with, and leaves sharp edges, which aren't great around kiddos or freshly painted walls. We find that gray fiberglass screen looks just as great and is MUCH easier to work with. Its also the stuff you typically make window insect screens out of, so you might have this lying around, or can buy a whole role for fairly inexpensively at the hardware store. Lay a larger piece of mesh over the back of the frame, and cut approximately 2" larger than your stapling area. Some frames will have nice flat frames, others slope back, but attaching to either is pretty easy.
We use a simple electric staple gun that takes 1/2" staples. Nothing high powered or fancy. Its best to staple no less than every 4" to keep the mesh taught. Its easiest to staple at each mid-point and then work to the corners from there. Staple just to either side of each corner, pulling taught diagonally as you do it to keep everything lying flat.
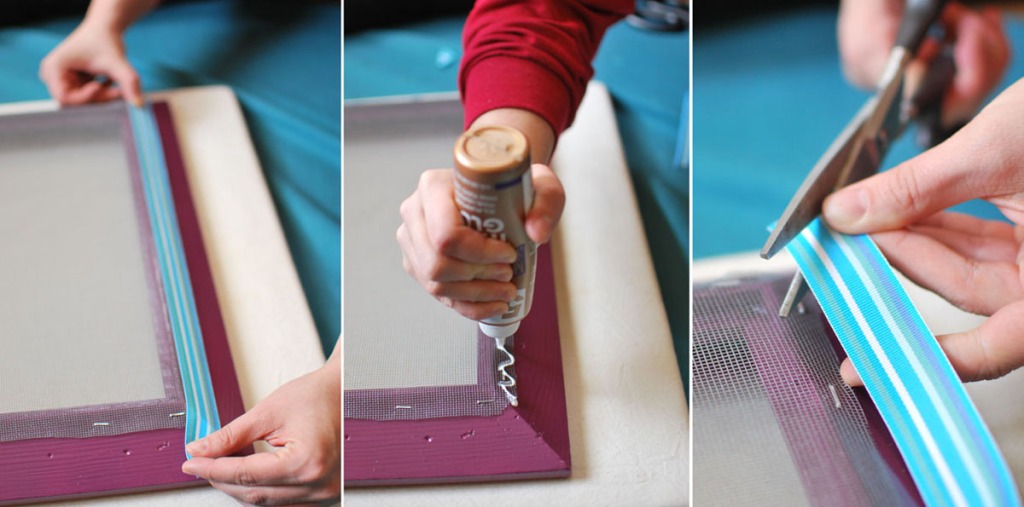
If the staples don't go in to the frame all the way, hammer them in the rest of the way. Trim the mesh back as close to the staple line as you can manage, but be careful to leave enough area so that it won't rip. We like to finish off the back side with a little grosgrain ribbon (attached with Tacky Glue) to cover the staple lines. (Grosgrain ribbon won't show glue through the way a satin or cotton ribbon will).
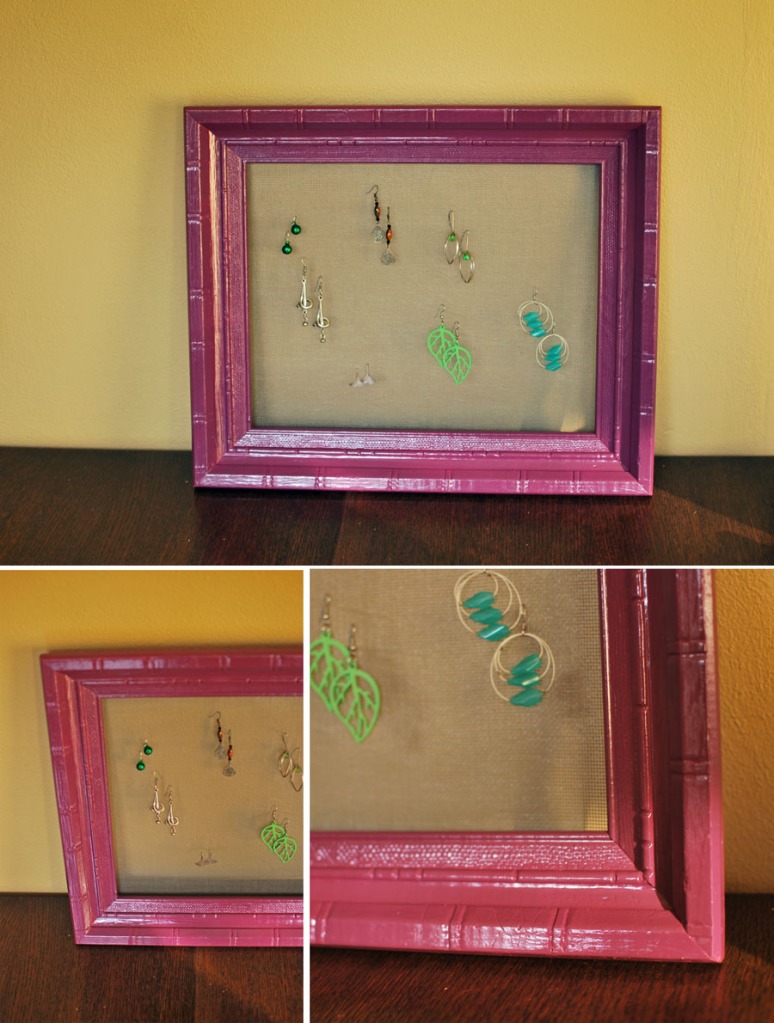
After the ribbon glue dries, attach your frame hanger of preference (We like the sawtooth variety) with some extra strength gorilla glue and you're ready to display your jewels! Earrings with hooks can go right through the mesh. For hanging necklaces we recommend the smallest size hitch pin clip, available in the bulk hardware section for pennies apiece. Have fun arranging and rearranging your collection by season.These jewelry hangers make great gifts, especially for Mothers Day later in the spring, and take about 30 minutes once you have the supplies handy. They can be a little bit of trial and error (it definitely took us a few go-rounds to get everything right) but they are fun and whimsical no matter what!! Give it a try.
:::::::::::::::::::::::::::::::::::::::::::::::::::::::::::::::::::::::::::::::::::::::::::::::::::::::::::::::::::::::::::::::::::::::::::::::::::::::::::::::::::::::::::::::::::::::::::::::::::::::::::::::::::::::::::::::::::::::::::::::::::::
Isn't that so cute - I am so inspired and the jewelry sitting on my dresser in a big heap can not wait for me to whip one of these up! Thank you so much Ravenna Girls for bringing us such a fun and accessible way to transform an old picture frame.


cute! (rebekah, will you show us yours when you're done, styled with some orangepoppy beauties?) great project!
ReplyDeletetoo cute! :-) love that you totally decorated the back also.
ReplyDeletemuch more fun than my nails in the wall- my current organization method ;)
ReplyDeleteYou could use that for all kinds of things...cool project!
ReplyDeletethat's such a great idea! you are very creative! thanks for sharing!
ReplyDeleteI was looking for this. Thanks a lot.
ReplyDelete